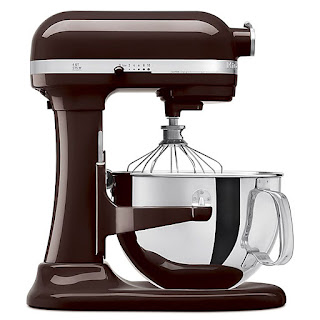
Kitchenaid Aqua Sky Mixer
With the release of our new brand slogan “Mix Better” this month, we wanted to put out the call for ideas as to how we can make people want to use it even more as they move forward into their next recipe. One of those innovations is an extra speed on most models, and that extra speed makes mixing not only faster, but also more precise. In my case I wanted to be able to mix two different kinds of dough in my mixer and see which one would form the best crumbed texture, so I ordered myself an aqua sky mixer with an extra power of 10. The blue color on the mixer’s black base and handle is a subtle nod back to what our company once was – the original Kitchen Aid.
Here is a look at how this machine works, as well as some ways you can get your hands on one!
What exactly does the kit do?
The KitchenAid Stand Mixer Aqua Sky mixes dough, but it doesn’t just work as a regular mixer would. It has a rotating blade that turns over a bowl to mix up egg whites or any other liquid you like to use, like cream, sugar, milk or cheese. You push down in the bottom part of the upper shaft and there will be tiny little bubbles that pop up on its surface if you push a bit. As you move the blades around it can create waves, pushing its way through different types of liquid or dough. At first, the blades might feel a bit rough and it becomes trickier. But it gets easier with each turn. The edges of the blades are smooth, so I found myself hitting the round side of the container over and over again, but it worked pretty well. After putting in more and more eggs for a few seconds, the mixer made the perfect light and fluffy batter like pancake batter.
For adding other liquids, I’d place them into the basket with the pre-routed holes, such as a large saucepan. Then I’d fill the bottom of the cup with water and add just enough to the top of the handle and stir. As long as the water level remains just above the rim of the lid, you can then squeeze the mixture into the cup and press it against the bottom of the water. Now there are no hard edges to hold and your batter is ready. And it won’t run when you stir it. For more, keep reading below!
Now that you’ve had a taste of these wonderful cookies (and I mean good ones by the way), it’s time to go with something simpler. You can mash the cup into the pan as a kind of cake batter and watch it foam and spatter. Or you can use a larger cup, like mine, and add ice cream or whatever else you want to make it. Once the ice cream melts the whole thing pops up with a small bit of sweetness and looks great. Then you can add toppings like peanut buttercream or chocolate chips and have everything freeze until it’s ready for the oven!
How much do I need in order to start making these cookies, etc.?
To create my cookie dough my measuring guide said I needed:
- 1 1/2 cups flour,
- 1/2 cup sugar,
- 1 tsp vanilla extract powder,
- 1tbsp oil,
- 1tbsp eggs,
- 1tsp lemon juice,
- 1tbsp vinegar,
- 2tbsp cold water and 6tbsp warm water or milk/oil until boiling.
I followed the directions for all of those items plus the additional step of adding an ounce of salt and water. My total product cost was 469.
Do I need a bigger size?
No, not really. This size can fit a 12 inch square pan or baking dish and it just fits a standard sized mug and teapot perfectly. If you wanted to change the recipe it could easily fit in a smaller size, but then you need to change the ingredients to accommodate it. So it can be too big or too small. Either way, it works out nice and easy even if you don’t need the full size. There are plenty of options that fit the needs of everyone.
Some recipes in my cookbook called for me not to use two tablespoons of sugar for each cookie, but no problem. Just put one tablespoon of sugar in the bottom of the pan, swirl the rest of the recipe up into the pan and scoop it into the pan. I made sure to take care to not over-do anything. Plus, by using a small amount of oil will save you money later on.
Are there specific settings that you can set?
As you can see from the picture I used for illustration purposes here, the settings are mostly pretty basic and you needn’t worry about it. You can make your own with your own hands or you can find them all online. Personally, I love being able to experiment. That’s why I use the option if not the setting I do. But if you know someone who likes experimenting with things it may serve as a useful tool.
Can it be used right now?
Yes, yes it can. Use it as many times as you want. The possibilities are endless. To mix your wet ingredient dough for example it’ll make pancakes or bagels, or make tarts with fruit, you name it. These are only temporary fixes and it works really well.
The verdict
I love having both the mixer and the mixer in the kitchen. When I’m cooking I’m usually doing my mixing through the sink before starting to stir the contents, but with the mixer the batter stays separate until I try to fold it through the mixer. And then when I am done it saves me the trouble of trying to reach the pot and finding an empty plate and pouring the batter down there instead. It has already started to become second nature!
Comments
Post a Comment